Connection to EDMS in ZUP 3.1
In the 1C: Salary and Personnel Management 8 program (starting with releases 3.1.20.96 and 3.1.18.336), the FSS EDMS is enabled by default 1C-Reporting reporting service (for other users you need to configure it in the program manually connecting the FSS certificate for ELN)
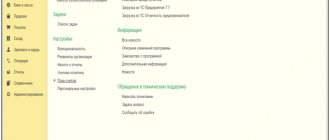
Four new jobs have appeared
in the “ Personnel”
- Information about insured persons (FSS) - sending information about insured persons to FSS through EDMS;
- FSS messages about changes in ENL - information about what ENL there are for an organization and how their status changes;
- Notifications of the Social Insurance Fund - information on Notifications on the submission of missing documents to the Social Insurance Fund;
- Incoming requests for information for calculating FSS benefits – receiving incoming (from the FSS) requests for information for calculating benefits. This document begins the countdown of 3 days for sending the register of direct payments (except for child care).
Setting up exchange with FSS 1C 8.3 ZUP
Let's look at how to install the FSS certificate in 1C 8.3 ZUP and set up the exchange.
In the Organization card on the EDI , click the Not used in the Electronic document flow with the Social Insurance Fund :
Check the Use electronic document management with FSS authorities and select certificates:
Click Burn and close . The setup is complete.
Download the electronic tax record and send information about benefits to the Social Insurance Fund.
Information about FSS insured persons
!!! The FSS recommends that policyholders submit information on all employees at the beginning of 2022. Now this connects a “subscription” to this employee’s sick leave. The FSS recommends submitting information for all employees now so that in the future you can easily find out the status of their ELN.
!!! TO CORRECTLY SEND Information about insured persons, you need the latest release of ZUP 3.1.20.97 + the patch EF_70000984 installed in it “ Information about the insured person is marked as not accepted with the error “Unknown status: “PROCESSED”.
Upon employment or during the period of labor, official, or other activities, the insured person provides the employer with information about himself necessary for the payment of benefits.
If you need to send only information about the insured person to the fund (without linking it to sick leave), then in the program this is done using the document
Information about the insured person (section Personnel - Information about insured persons (FSS) ). The document can also be generated from the Hiring ( Create based on ).
You can send information about this particular employee from a document using the Send to fund or from a workplace where you can send information about several employees at once (having previously selected them in the list) using the Send .
After sending the information, the document is blocked. If for some reason the fund received a request to correct previously sent information, then it is necessary to generate a new document Information about the insured person using the Information for the Social Insurance Fund .
the Information about insured persons (FSS) workplace, for the convenience of working with the list of documents, selection buttons are provided: “All” , “On registration” , “To be sent” , “In progress” .
How can an authorized representative register on the FSS portal?
To submit reports to the FSS for organizations whose FSS registration number differs from the registration number of the sender’s organization, the sender must perform a number of actions:
- Register on the portal https://fz122.fss.ru;
- Log in with your registered username and password on the portal https://portal.fss.ru;
- Upload the electronic signature of the responsible person (sender) to the portal;
- Generate a list of represented organizations and upload scanned originals of powers of attorney to the portal;
- Provide copies of powers of attorney on paper to the territorial body of the Social Insurance Fund;
- Wait for the results of the verification of credentials by FSS employees and assignment of the “approved” status.
After completing the above steps, the sender will be able to submit reports not only for his organization, but also for the list of organizations added in the FSS personal account
Registration on the FSS portal
Using an Internet browser, go to https://fz122.fss.ru, then in the upper left corner click the Registration
On the page that opens, you must fill in the fields of the User Data
and then click the button
Go to step 2
Attention!
The full name in the user data must match the full name of the certificate owner.
An email will be sent to the specified email address to confirm registration. To complete registration, just follow the link from the letter.
The initial stage of working with the FSS portal
Using an Internet browser, go to https://portal.fss.ru/, then in the upper right corner, enter the username and password that you entered earlier during registration.
Attention!
After completing user registration steps, access to the portal https://portal.fss.ru/ may not be available for some time!
For further configuration, you will need to have a personal electronic signature file in *.cer format. You can get it as follows:
- Go to your workflow account settings.
- Open to view the certificate of the responsible person of the organization in the Certificates
by clicking on the button - In the window that opens, click Open certificate
. - In the certificate that opens, go to the Composition tab and click the Copy to file...
- The Certificate Export Wizard will launch. Without changing the export parameters, using the Next
, you need to reach step 4 of the wizard, where you will be asked to specify the location and name of the saved file. When the wizard completes, information about the saved certificate file will be displayed.
At this point, the receipt of the electronic signature file is completed, and you can proceed to further work with the FSS portal. After logging into the portal, you need to go to the Profile
, select the
Authorized
and, using the
Upload certificate
, indicate the storage location of the certificate uploaded in the previous paragraph.
After logging into the portal, you need to go to the Profile
, select the
Authorized
and, using the
Upload certificate
, indicate the storage location of the certificate uploaded in the previous paragraph.
Working with the list of represented organizations
Once the certificate has been downloaded, you will be able to add represented organizations.
To create a record about the organization for which reporting will be submitted, you must use the Add
.
In the window that appears, enter the details of the organization you represent and click the Search
.
The table below will display the search results. Having selected the line with the organization of interest, click the Add
.
A new entry will appear in the list of represented organizations. To proceed further, you must click the Save
.
Next, you need to indicate the validity period of the power of attorney and upload its scanned version in *.pdf format using the button
This completes the steps on the portal to add the represented organization.
Attention!
For each added organization, it is necessary to provide a copy of the power of attorney on paper to the territorial body of the FSS to verify the powers and approve the status of the authorized representative! After submitting a copy of the power of attorney to the FSS, the user must wait until the status of the entry in the personal account changes to Approved (green) and only after that send reports.
Notifications to the FSS (receiving notifications from the FSS about the provision of missing documents)
If the policyholder has not fully submitted documents or information for the assignment of benefits, the territorial branch of the Social Insurance Fund, within 5 working days from the date of receipt, sends a notice to the policyholder about the provision of the missing documents or information. The notice is sent electronically.
Upon receipt of a notice, the policyholder must send an electronic confirmation of its receipt within 5 business days from the date of receipt.
“FSS Notifications” workplace, you will receive notifications about the submission of missing documents for direct payment of benefits in electronic form. To receive notifications, click on the “Receive from FSS”
Clicking the “Open FSS notice” or from the FSS Notice document opens the document sent by the FSS.
It is necessary to familiarize yourself with it and understand what the Foundation requires. After this, you can Confirm receipt of the notification.
FSS messages about changes in ENL
These notifications allow you not to wait for the employee to provide the sick leave number to the employer. The employer receives from the Social Insurance Fund:
a) notifications about new electronic sick leave,
b) notifications of changes in the status of electronic sick leave.
Now, starting from 2022, receiving messages from the Social Insurance Fund about changes in the electronic insurance policy is available to all policyholders (previously, the Social Insurance Fund drew up special agreements with individual participants in the pilot operation of the service)
a) Obtaining employee consent to notifications about electronic safety nets
ATTENTION!!! from 01/01/22, there is no requirement to obtain consent to inform the employer about the ENL.
The FSS receives information about the places of work of an individual from the Pension Fund of the Russian Federation and sends messages about changes in the electronic tax record to all places of work.
b) Receiving notifications about the status of ENL in the FSS
In the Workplace FSS Messages about changes in ELN (section Personnel – FSS Messages about changes in ELN ) you can receive electronic sick leave for employees and information about the status of these ELN in the FSS. Messages from the FSS are downloaded by clicking the “Receive from FSS” .
Incoming requests for information for calculating Social Insurance benefits
This document begins the countdown of 3 days for sending the register of direct payments (except for child care).
Requests from the fund for information that the employer must send to the Social Insurance Fund for payment of benefits are received in the Incoming requests for information for calculating Social Insurance benefits “Receive from Social Insurance Fund” button
How to install a certificate of the insured organization
Contact an accredited certification center to obtain an organization certificate. If you plan, in addition to downloading the electronic tax record and sending the electronic tax registration registers , to also send 4-FSS and the Register of information necessary for the assignment and payment of benefits , then the certification center must be in the list of trusted centers of the 1C company.
Then install the cryptoprovider CryptoPro CSP or VipNet CSP. Let's look at installing an electronic signature using CryptoPro as an example.
Run the program and on the Tools click View certificates in container :
Select the container using the Browse or By certificate , set the Entered name specifies the key container radio button to User and click Next :
Click Install :
The certificate will be installed in the Personal :

