Ways to check reports
Law No. 125-FZ dated July 24, 1998 established that filing and checking Form 4-FSS is the responsibility of all types of employers. They prepare the document on a quarterly basis. The form has a unified template, which is fixed by Order No. 381 dated September 26, 2016. Also see “Form 4-FSS in 2022.”
The calculation according to the approved form can be submitted in paper form or electronically. Depending on the method used to prepare the finished form, the deadlines for its submission to the regulatory authority differ:
- when submitting a document on paper, verification of 4-FSS in 2018 and the fact of acceptance of the form by the responsible person in the government agency must be carried out by the 20th day of the month following the reporting quarterly interval;
- when submitting the form via TKS electronically, time restrictions are fixed within 25 days after the end of the reporting quarter.
Also see “Deadlines for submitting 4-FSS in 2022“.
In the latter case, the 4-FSS can be checked online. This is done using special services of the Social Insurance Fund on the official website of the government agency. Preliminary verification of control ratios, accounting data and numerical values reflected in the reporting form are mandatory stages in preparing a document for submission to government agencies. Options for implementing verification activities:
- checking 4-FSS on the FSS website online - carried out by policyholders independently;
- employers perform reconciliation manually without the use of software;
- a desk audit, which is initiated and carried out by the regulatory authority without the involvement of the policyholder to confirm the correctness of the information contained in the form;
- on-site inspection format.
Submitting a report to the Social Insurance Fund
The generated report can be sent to print by clicking the “Print” button.
Fig.18 Print
Please note that only completed sections of the report are printed. If the organization does not temporarily send its employees to another employer in accordance with paragraph 2 of Article 22 of Federal Law 125-FZ (information is indicated in Table 1.1 of the Report), and also does not make expenses in the reporting period for compulsory social insurance from the National Social Security (Table 3, 4 of the Report), these sections are not formed.
On the left side you can check the box which sections need to be printed, and also set the number of copies. However, this function is becoming less and less in demand, as more and more companies, regardless of legal requirements, seek to send a report to the regulatory authority in electronic form.
1C allows you to send a report to the Fund directly from the program when you connect the 1C-Reporting module. To do this, you need to click the “Send” button, after which the window for connecting the “1C-Reporting” module pops up.
Fig. 19 1C-Reporting
If the organization has connected another program for sending reports to regulatory authorities, the 1C program provides the ability to download a report file in XML format for subsequent loading into another electronic document management system. To do this, you need to click the “Upload” button and save the generated file in a place convenient for archiving, and subsequently send it to the recipient of the report.
Do-it-yourself check
Using electronic services on the official website of the Social Insurance Fund, the 4-FSS report is checked online by the employer independently and free of charge. The sequence of actions is as follows:
- Log in to the social insurance website https://portal.fss.ru and go to the menu item https://portal.fss.ru/fss/services/f4input.
- On the portal, an electronic document template is filled out or an already generated report is uploaded.
- The 4-FSS report is checked on the FSS website, and the result produced by the program is analyzed.
Desk type of verification activities
On-site data reconciliation is carried out by employees of the regulatory body without the participation of the policyholder. The documentary basis for verification is the fact of receipt of the report. According to its content, the correctness of calculations for insurance premiums, the completeness of their transfer, and compliance with the deadlines for repayment of obligations are analyzed. A 4-FSS check (online for free or carried out by specialists as part of a mandatory desk reconciliation) is necessary to assess the legality of the costs incurred for the payment of social benefits.
Up to 3 months are allotted for non-travelling analytical reconciliations. The countdown starts from the moment the document is actually submitted to the controlling structure. If inaccuracies or gross errors are identified, the policyholder is notified in writing. In this situation, the policyholder is given the opportunity to justify his actions to reflect conflicting data by providing explanations. Each detected offense is recorded in an act.
How to submit reports to the Social Insurance Fund electronically
Recently, more and more taxpayers, voluntarily or forcedly, are switching to reporting electronically. In this article we will consider in detail the provision of reporting to the Social Insurance Fund through the fund portal.
Let us remind you that in accordance with paragraph 10 of Art. 15 of the Federal Law of July 24, 2009 No. 212-FZ “On insurance contributions to the Pension Fund of the Russian Federation, the Federal Social Insurance Fund of the Russian Federation, the Federal Compulsory Compulsory Medical Insurance Fund and the Federal Compulsory Compulsory Medical Insurance Fund”, payers of insurance premiums whose average number of individuals in whose favor payments and other remunerations are made for the previous settlement period exceeds 50 people, as well as newly created (including during reorganization) organizations whose number of specified individuals exceeds this limit, submit the calculations specified in part 9 of this article to the body monitoring the payment of insurance premiums in the established formats in the form electronic documents.
First of all, it should be noted that it will not be possible to take advantage of this opportunity “at the last moment”, because... In order to submit reports through the portal, the following is required:
- expanded access rights on the FSS portal;
- EDS certificate of the organization on key media;
- certified cryptographic information protection tools (CIPF), for example, CryptoPro CSP or VipNet CSP;
- FSS EDS certificates and a utility for encrypting and signing EDS documents.
Let's consider these points in more detail.
1. Expanded access rights on the FSS portal
First you need to register* on the FSS portal at the following address.
*Please note: a registration notification is sent by email indicating your login and a link to confirm registration, but you must remember (and write down) the password yourself, because it is not contained in the letter.
After receiving the letter, you need to confirm your registration by clicking on the link included in the letter. After confirming your registration, in order to receive extended access rights, you must fill in the details** of your account.
**Please note: when filling out the details, you will need to select a regional department/branch of the Fund from the list - usually the number of the regional branch of the FSS coincides with the first four digits of the policyholder’s registration number and is indicated in the report on Form 4 of the FSS of the Russian Federation in the column “Subordination Code”.
After saving the completed details, you can safely proceed to the formation of the policyholder’s Application for the provision of extended access rights in the search and monitoring system of the FSS of the Russian Federation . When you select the “Policyholder Application” menu item, the data will be entered automatically from the organization’s details.
Print out the application, sign it with your manager, seal it and take it to the FSS. You can also send the original application by registered mail. Within a few days, the application will be reviewed and an email will be sent to you notifying you of the granting of extended access rights.
Detailed step-by-step instructions are set out in the document “ Recommendations for submitting pay slips on Form 4-FSS in electronic form using an electronic digital signature ,” which is possible (and necessary).
2. EDS certificate on key media
We warn you right away: “free reporting through the FSS portal” only means that the FSS itself does not need to pay anything. However, if we do not have a digital signature, we will have to order it from the providers of this service.
When analyzing several certification centers, it was found that not all certification centers issue digital signature certificates for submitting reports to the Social Insurance Fund through the fund’s portal. So, for example, Taxkom and Kaluga-Astral do not separately issue or sell digital digital signatures for the Social Insurance Fund, only complex software “packages” (FSS + Pension Fund, Federal Tax Service Inspectorate + Pension Fund + Social Insurance Fund) with payment for annual maintenance.
Other certification centers provide digital signature certificates for the FSS, but this service is paid. In this case, not only the production of the digital signature itself is paid (about 1,500 rubles), but also the “examination of the authenticity of documents” (about 2,000 rubles). It's not a cheap pleasure.
The service for providing digital signatures for the Social Insurance Fund was discovered in Kontur-Extern. There you can get an electronic digital signature for free and, if you wish, use their service to send reports to the Social Insurance Fund***.
***Please note: this opportunity is not available for all regions of the Russian Federation.
What is needed to obtain an EDS certificate from Kontur Externe:
- go to the Kontur-Extern website and fill out an application for connection, indicating in the comments “EDS for the FSS of the Russian Federation” or contact them by phone and ask for a registration form to fill out;
- find the nearest service center of the Kontur-Extern system and submit to them a registration form signed by the manager and certified by the seal of the organization;
- in a few days (in Moscow they promise to do it in 2 days) pick up the key media for the EDS certificate at the service center;****
- Having received the initialized key medium, generate an EDS certificate for signing and encrypting reports to the FSS on this key medium (instructions and a program for generating an EDS certificate can be found on the Kontur-Exeterna website in the “Electronic reporting to the FSS” section, and valuable instructions can be obtained by contacting to technical support).
****Please note: you can only obtain an electronic digital signature for the Social Insurance Fund in Kontur-Externe for the manager and he must pick it up at the service center in person with a passport (this registration procedure is not suitable for all companies).
3. Certified cryptographic information protection tools (CIPF), for example, Crypto Pro CSP or VipNet CSP
To work with the EDS of Kontur-Externa, the CIPF program “CryptoPro” CSP must be installed. The distribution of this program can be downloaded from the Crypto Pro website after registration.*****
*****Please note that when registering on the Crypto Pro website, you are required to enter a password of a high level of complexity. A letter with your login and password is sent to the email address specified during registration.
The free version of the program is valid for 30 days, and then you need to purchase a license to use the product (the annual service price is 1,800 rubles).
To download the distribution kit of the Crypto Pro CSP program from the website, you need to select the Products menu on the main page - CIPF “CryptoPro CSP/TLS/JCP” - File download.
To get started, we recommend downloading the file “Documentation for installing and using CryptoPro CSP 3.6 R2”. From the list of proposed distributions, select the one that is suitable for your operating system (for Windows - Certified version of CryptoPro CSP 3.6.6497).
CryptoPro distributions designed for 32 and 64 bit versions of Windows are available for download. To determine the version of your system, go to Control Panel – System/System Information on your computer. If the system type is not specified, then most likely it is 32-bit. ******
******Please note: installation of the CryptoPro CSP CIPF distribution must be performed by a user with administrator rights.
Then you need to install and configure the program, guided by the documentation for installing and using the CryptoPro CIPF.
4. FSS EDS certificates and utility for encrypting and signing EDS documents
To continue working, you must install the following files on your computer:
- Root certificate of the CA FSS of the Russian Federation;
- Certificate of public key signature of an authorized person of the FSS of the Russian Federation for encrypting the report and verifying the receipt;
- A utility for encrypting and signing digital signatures of documents.
You need to install FSS certificates and configure the encryption utility, guided by the “Recommendations for submitting payslips according to Form 4-FSS in electronic form using an electronic digital signature,” mentioned in paragraph 1.
After installing and configuring all components, you can proceed to preparing a report file in accordance with the format approved by the Social Insurance Fund of the Russian Federation, which satisfies the control ratios of format-logical control indicators in accordance with the Appendix to the order of the Federal Insurance Service of the Russian Federation dated March 21 No. 53 “Technology for accepting payments from policyholders for accrued and paid insurance premiums in the FSS system of the Russian Federation in electronic form using an electronic digital signature.”
This Application can be downloaded from the same address as the FSS RF certificates.*******
*******Please note that the control ratios of the indicators will most likely differ from the figures obtained by the taxpayer during the step-by-step calculation. So, for example, with the policyholder code 041, Control ratio No. 3 in F-4 - section 1 - table 1 - line 2 columns 3 (Amount) = (0.019 * F-4 section 1 table 3 line 4 columns 3 (Total base...).With policyholder code 071, Control ratio No. 5 in F-4 - section 1 - table 1 - line 2 columns 3 (Amount) = (0.029*F-4 section 1 table 3 line 4 columns 3 (Total base...).In addition, you need to pay attention that the monthly indicators when calculating give the totals (i.e. if you had to correct the totals, you need to check that the monthly amounts add up to this total and, if necessary, correct the monthly amounts ).
The prepared report file must be signed with a private key (digital signature of the organization) and encrypted with the public key of an authorized person of the FSS in accordance with the FSS Recommendations. Once signed and encrypted, the report file can be sent either using the arm.exe Signing and Encryption Utility, or directly through the FSS gateway. Once submitted, the report will be assigned a unique ID - be sure to write down and save this number.
If errors are identified when checking the report file, you must once again repeat the steps of filling out the report, followed by saving, signing and encrypting it.
You can view a transcript of the error by using the “Download report” link on the FSS portal and opening it in Notepad.
Upon successful completion of the four stages of verification of the report file, a Receipt will be generated, which must be downloaded and saved on your computer. The receipt can be downloaded on the FSS portal in the “Check and Control” section, using the unique Identifier . The Receipt file is a legally significant document confirming the fact of receipt of the FSS report. ********
Using the automated workplace signing and encryption utility F4 on the “ Check signature ” , you can decrypt and check the signature of the Receipt. The decrypted Receipt must be printed and filed with the report.
********Please note that the report file may be processed on the FSS portal within 48 hours, so it is necessary to submit the report in advance.
Note.
If the buttons that should be active are not available in the browser, try making the following settings in the browser:
- menu "Tools" - "Internet Options" - tab "Advanced" - Restore defaults ;
- Next, make the settings:
— “Security” tab — Trusted nodes — “Other” button — Active X elements and connection modules — select “enable” in all subsections ;
— “Privacy” tab — Options — select low level ;
— “Privacy” tab — Pop-up blocker — Enable pop-up blocker — uncheck the box ;
— “Advanced” tab — “TLS 1.0, SSL 2.0 SSL 3.0” — check the boxes ;
— “Advanced” tab — Show notification about each script error — check the box;
— “General” tab — Browsing history — “Delete” button — delete Cookies, temporary Internet files.
After this, there should be no problems with the operation of the FSS RF portal.
In conclusion, it should be noted that the process of obtaining certificates, installing and configuring programs necessary for submitting reports electronically through the FSS portal is very labor-intensive and does not fall under the “easy and simple” category. At each stage, an accountant may encounter difficulties and obstacles. We really hope that our article will help you get a general idea of the scope of the work ahead and answer questions that arise in the process.
Hello Guest! Offer from "Clerk"
Online professional retraining “Chief accountant on the simplified tax system” with a diploma for 250 academic hours . Learn everything new to avoid mistakes. Online training for 2 months, the stream starts on March 1.
Sign up
Monitoring as part of an on-site inspection
Checking the submission of the 4-FSS report online is available for registered users on the FSS website. The completed stages of automatic monitoring of information from the reporting form and the completion of a desk audit do not guarantee that fund specialists will not conduct on-site monitoring activities. The following features are typical for on-site inspections:
- the entire list of operations performed is included in the inspection plan;
- information for the reporting period and the three years preceding it will be verified;
- there can be no more than 2 months between the start date of the inspection and its end date;
- The frequency of implementation of this form of monitoring is limited to once every three years.
Control can affect not only reporting forms, but also contractual documentation, primary documents, and acts. Recommendations for checking Form 4-FSS and documents related to the report establish that if, as a result of analysis of the submitted forms, cases of understatement of obligations for insurance premiums or facts of unreasonable expenditure of funds on insurance coverage are identified, these amounts must be additionally accrued and shown in the report for the corresponding period. Such information is reflected in Table 2.
Report to the FSS from 1C
Like almost any report in 1C, the report in the FSS is generated automatically. To do this, go to the menu “Reports” - “1C-Reporting” - “Regulated reports”.
Fig. 10 Regulated reports
By clicking the “Create” button. The report selection window will open.
Fig.11 Report selection window
After selecting the type of report (in our case, this is form 4-FSS), a window for selecting the period for which we generate the report opens.
Fig.12 Period selection window
We choose the 1st quarter of 2022. The main report window opens, with all sections listed on the left.
Fig.13 Main report window
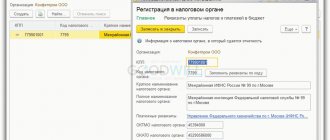
The information on the title page is indicated automatically, this is the period for which the report is generated, the full name of the organization, its tax identification number, checkpoint, registration address.
The remaining sections of the report are not filled in; to fill them out, you must click the “Fill” button.
Fig.14 Fill in the remaining sections
After this command, the program automatically fills in information about the payroll for the period, broken down by month (Table 1 of the report).
Fig.15 Table 1 of the report
In Table 2, information about the debt at the beginning of the period is automatically entered, contributions for the period are calculated by month, and results are displayed taking into account payments for the past period.
Fig.16 Table 2
Next, you need to click the “Check” - “Check control ratios” button.
Fig.17 Check control ratios
The program checks the necessary control ratios, and if errors are detected, it notifies you of the need to make changes to the report.