STAGE 3
Destination folder
At this stage of installation, you are asked to select the location where the program will be located. We do not recommend storing important work files on the same disk on which the system is installed. In most cases, Windows is located on the C drive, which means it is better to select another drive to install the program, of course, if it is available.
This is done so that if Windows loses its functionality (and this happens), the program’s working files are not damaged and remain safe on another drive.
If you don’t have a logical drive other than C on your computer, you will have to select a folder there, or leave the default path: C: Taxpayer Legal Entity Click next.
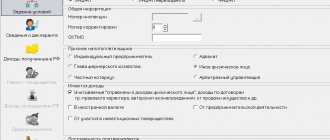
As soon as the program launches for the first time on your device, it will offer to configure itself. A window will pop up called “Adding a taxpayer”:
Here you need to select from the fields presented, according to what reports you are going to generate: an entrepreneur, a legal entity or an individual. The choice of Foreign organization and Separate division is also available.
We will outline the further steps for the Individual Entrepreneur, since the majority of our visitors are individual entrepreneurs. So, by selecting “Individual Entrepreneur” and clicking “OK”, we are offered to configure the individual entrepreneur’s data for use in further reports and documents.
Fill out the fields in any order. A sample of how to fill them out is shown in the screenshot.
I would like to pay attention to the “Taxpayer Category” field. By clicking on the square framed by a dotted line, you can select your status
We select line 05: Individual entrepreneur who does not make payments to individuals.
Note! Each square framed by a dotted line is a function button. You can click on it, an additional window will open, which is designed to select information entered into the corresponding field. It is available for almost every field, except for “when and by whom the passport was issued,” “stay address” and “place of birth”
Once you have filled in all the required fields, click “Apply” and “OK”. Remember: you can edit the entered information at any time by simply clicking on the person registered in the program, whose name is in the upper right corner under the menu:
This completes the installation and initial configuration of the Taxpayer. Be sure to save the page so you can easily find it when needed.
After we have figured out the features of installing the latest program, we move on to describing the update procedure.
It consists of the following:
- Close the version of the “Legal Taxpayer” program running on your PC (if it was open on your PC);
- If it is packaged, then unpack it and run it;
- When a warning about the executable file appears, click on “Yes”;
- Check the box next to the “I accept” option and click on “Next”;
Select the “I accept” option
- Next, select “Full” and click on “Next”;
Select “Full”
- A screen will open for you to select where to place the program on the disk. Click on “Change” and specify the path where the previous version of the program was installed. This point is very important! For example, it could be C: Taxpayer Legal Entity.
Select the path to install the program (must match the previous version)
- Then click on “Next” below and wait for the program to install. At the end, click on “Finish”, this will complete the program update;
- After installation, a window may appear indicating a possible incorrect installation. Click on “This program installed correctly”;
- Launch the program. Reindexing will start automatically. Wait for it to complete;
Wait for reindexing to complete
- After re-indexing is completed, the program window will open, and at the very top you will see its version. In our case it should be 4.65
;
Make sure to install the new version of the program
- Now close your Legal Entity Taxpayer program;
- Run it and wait for the installation to complete;
- Run the program, wait for re-indexing and launch. Look at the very top of the program and make sure you are using the most current version of the product.
The new version of the program is installed
Solving problems that may arise during startup
When installing the program from the website of the federal service, problems may arise; to resolve them, you need to open the system event log and look at the entries regarding the “Legal Taxpayer” complex. If any component fails, it will be reflected on the monitor.
To open the log, you need to right-click on the “My Computer” shortcut, go to “Management”, then “Computer Management” and open “Utilities”. The Application Event Viewer will have all the details about the program.
If you need to install an updated and current version, the program must be closed at this moment. Before doing this, you must save the previously entered information; the archive storage location will be suggested; it can be changed manually. To restore data, go to “Service” and select the appropriate tab.
If all steps have been completed correctly, the main field with the legal entity’s data has been filled in, all forms have been accepted, you can begin entering data into the reporting. If the file in the transfer format shows an error, you need to check the reporting period, current updates, Internet availability, and also look at the system message log.
If necessary, contact technical support. This can be done by contacting the developers' website or by calling. Programmers will help you quickly solve any problem.
STAGE 1
Launch the program by double-clicking on the downloaded installation file. Windows will most likely ask you if you agree to open the executable file, click yes or OK.
Next, a window with a license agreement will open in front of you:
Read it carefully, check the menu item “I accept the terms of the license agreement” and click “Next” below. Accordingly, if you do not accept the program license terms, the installation will not continue.
When purchasing software, the user receives a license - a non-exclusive right to use the software. The exclusive right will only be for software that is created by the user himself or at his request, or purchased under a special agreement. How to take into account non-exclusive rights to licensed software? View answer
Basic manipulations
When we talk about entering and processing tax reporting documents in “Taxpayer Legal Entity”, we mean their creation, opening, deletion, unloading, as well as the formation of a transport container file.
To work with tax reporting documents, you must select the menu item Documents→Tax reporting . In the window that appears, the entered documents for the selected taxpayer for the selected tax/reporting period will be presented, indicating:
- KND;
- title of the document;
- his condition.
If for the selected reporting period no document was entered for the selected taxpayer, an empty list will be displayed.
The reporting period, as well as the taxpayer, can be changed directly from this window. This will automatically update the list of entered documents.
The document status is informational in nature and reflects the last user action with the entered document.
EXAMPLE
If you check a document in input mode and no control errors are detected, it will have the “checked” status. A successfully uploaded document will have the status “uploaded to file”.
If a document has refined calculations, the status will be shown for the document that has the greatest refinement.
For documents that can be submitted by the same taxpayer more than once for the same reporting period (document criteria), the status of the document is not shown. Such documents are indicated by an icon.
A list of document criteria indicating their status will be shown when editing such a document.
In this mode you can:
- create a new document;
- open the document for editing;
- delete document;
- upload the document in the approved format;
- generate a transport container file for reporting through the website of the Federal Tax Service of Russia or the Government Services Portal;
- copy the document to another reporting period;
- upload a document uploaded in accordance with approved electronic submission formats.
To create a document, use the button ( [Insert] ).
To open the document, use the button ( [Enter] ).
To delete a document, use the button ( [Delete] ).
Also see “What settings does Taxpayer Legal Entity have and how to configure them for convenient work.”
Upload the file obtained after using the converter into the Legal Entity Taxpayer program
Using our converters, you can “instantly” fill out a VAT return! You can download the converters here.
To download the Declaration with sections - purchase book, sales book, journals of invoices received and issued in the Taxpayer Legal Entity program, you need to complete the following steps.
The book of purchases and sales can be uploaded to the Taxpayer of Legal Entities directly, and not as part of the declaration. How to download the purchase book is written here, and the sales book is here.
To upload invoices, and not a Declaration, to the Taxpayer Legal Entity, you need to use a special converter for Invoice Journals, which you can also purchase by contacting us.
How to transfer Taxpayer Legal Entity to another computer
An easy way to transfer Taxpayer to another computer
Right-click on the program shortcut, then select “File Location”.
Go to the folder with the program.
You may have a different path to the program. Now we go up a level and copy the entire folder to a flash drive.
My program “Legal Taxpayer” is located along the path “C:NP YULINPUTDOC”. This means I will copy the folder from the path “C:NP LE”, the folder “INPUTDOC”.
After copying the program to the USB flash drive is completed, you can copy it to a new computer. In order to run the program on a new computer, go to the folder with the program and open the file “inputdoc.exe”
After this, your “Taxpayer Legal Entity” will be launched and you can start working fully.
Now let's look at a more complex method.
A difficult way to transfer Taxpayer to another computer
This method is divided into two stages. First stage.
We save our database. We need to go to the “Service” tab. In this tab we need the “Save information” item. Let's choose it.
Next is the most important point. Before making a backup copy of the Taxpayer Legal Entity database, we need to understand whether to make a copy of the entire database or just some people.
Now let's copy our backup to a second computer.
Now on the second computer we need to install the “Legal Taxpayer” program.
After we have installed the “Taxpayer” program on the second computer and copied the backup copy, we will proceed to the second stage.
Second phase. We restore data.
To do this, we need to open the “Legal Taxpayer” program. Next, go to the “Service” menu and select “Information Recovery”.
Next, we need to indicate the location to which you copied the database backup. Please note that you only need to specify the folder in which the backup is stored; you will not see the backup file itself. For example. My path to the backup looks like this “C: Backup copy of NP Legal Entity”, in this folder I have a file with a backup copy.
This means I will have to specify exactly the path “C: Backup copy of NP Legal Entity”.
If you did everything correctly, you will see information about how much data will be recovered.
Now click “Continue”.
Next, we choose what exactly we will restore. If you need to restore the entire database, then select the “For all taxpayers” item. If only some organizations, then select the item “For selected taxpayers”. I select the item “For all taxpayers”. Click “Continue”.
Then the database recovery procedure will start. After the database is restored, you will see a window like this, all you have to do is click “Finish”.
Source
Frequently asked questions when working with the Taxpayer PC
- №1 / №2: How can I generate a report on insurance premiums in the Taxpayer PC, which will be submitted to the Federal Tax Service starting from 2022? / How to generate a 4-FSS report in the Taxpayer PC?
- №3: We are trying to download the information system for the Pension Fund of Russia (ADV-1,2,3), but the program writes that there is no information for output. What should we do?
- №4: In reporting in some forms, not all sheets are active, but we are asked to do everything, what should we do?
- №5: Why do I only have the accrued amount in my income, but no taxes?
- №6: In 2-NDFL, some people are marked in blue, what does this mean?
- №7: How to bring one person into 2-personal income tax?
- №8: Why don’t we have a “Printer (output to magnetic media)” icon in our Salary (income, IC (contributions), Pension Fund)?
- №9: We paid an employee financial assistance of 10,000 rubles, only 6,000 rubles should be subject to income tax, but we are subject to the entire amount, what is the reason?
- №10: How to create an electronic register of sick leave for sending to the Social Insurance Fund?
- №11: The program does not allow you to add employees with civil law to the payroll, why and what to do?
- №12: Our company is moving equipment, how can we transfer the program databases to a new computer?
- №13: We launch the program from the server, over the network, errors appear, the program does not work, what should I do?
- №14: What are the minimum computer requirements?
- №15: How to add and configure a new (your) statement type?
- №16: How to install KLADR?
- №17: The list of documents is not displayed in Reporting, it says “the page cannot be displayed”, what should I do?
- №18: Is it possible to work in the taxpayer program on different computers without installation, for example from an external drive (flash drive)?
- №19: Is it possible to maintain more than one organization in the program or do I need to install the program again?
- №20: Is it possible to import data into the program?
- №21: Is it possible to import data from the previous year's program?
- №22: The summary in the statement does not correspond to the data in the “Reporting, taxes and contributions” mode, why?
- №23: Does the program have backup and how can it be used?
Answer: First you need to generate a salary or fill out income in the “Register” mode (you can import it in DBF format from third-party programs, see the description in the ReadMe2.txt file in the installed program directory). Then, go to the “Reporting, taxes and contributions” – “Individual card” mode and check the desired quarter and year from above. The list of employees should be colored black and there should be checkboxes in front of the full name of the employees (those colored in red are not transferred (not prepared); then click “group operations” (gear under the list), check the box “transfer data from income to everyone” - “ok” (green checkmark) and close. Enter the “Reporting, taxes and contributions” mode - “declarations and calculations”, “6-NDFL”. Select 2022 from the top. Create an empty report - click “apply”, on the left click “fill out” ( blue down arrow) Click “Output” - upload the file (when uploading, indicate the path where to save the file).
Answer: Go to “Reporting, taxes and contributions”, “personalized accounting”, “Questionnaires (ADV 1-3)”, check that the names of the required employees are “black”. If they are “red” in color, you need to “stand” on such people and see what is emphasized by the red stripe, eliminate (fill in) what is missing. If people are “black” and still are not displayed, then you need to go to the group operations from below, check the boxes: Reset output attributes (if possible), and click “Run”.
Answer: Click on the inactive sheet with the left mouse button and click on the add sheet button (white sheet with a plus in a green circle), similarly, you can delete an unnecessary sheet (button with a minus in a red circle).
Answer: Because you have disabled automatic calculation, you need to go to “Salaries and Personnel”, “Income (Tax Register)”, “Group Operations”, check the box for “auto calculation” and “recalculate everyone” and click the “Green checkmark”.
Answer: This means that for these people the calculated tax is not equal to the withheld tax.
Answer: Go to 2-NDFL, leave a checkmark to the left of the last name only on the desired person and click output to magnetic media.
Answer: The version is not registered. Perhaps the TIN/KPP was changed, the number of employees exceeded the paid limit, or the registration number was changed. Bring everything into compliance and re-enter the registration number. If there really are more employees and they are all needed, then pay the remaining amount and enter a new registration number.
Answer: When you added financial assistance, you either did not set the 503 deduction at all, or did not set the deduction amount of 4,000 rubles, in this case the entire amount is taxed, as you did. Call the accrual for editing and correct errors.
Answer: In the program, go to the “Reporting, taxes, contributions” item. Next, select “Reporting to the Social Insurance Fund under Order No. 579 dated November 24, 2017.” After this, you need to click on the “add line” icon and fill in the required data.
Answer: Employees who are not under an employment contract will not be added to the payroll, because they should not have contributions to the Social Insurance Fund. Such employees must be added to a separate type of statement and for them it is necessary to use a separate type of accrual (DGP - Gr.-legal agreement) which is in the program. To do this, in the menu “Directories”, “economic”, “Types of statements”, you need to add and configure a new type of statement. About setting up payroll types - see here
.
Answer: The easiest way is to copy the folder with the database (for example B1) from the folder with the installed program to the folder with the program on the new computer, first install the program on the new computer; during installation, administrator rights are required (Run the installation by right-clicking and left-clicking “ Run as Administrator").
Answer: For the program to work correctly in network mode, it is necessary to install the program both on the computer on which the database will be stored (Server) and on the client computer. Then enable network mode, open network access to the folder with the program on the server, register the network path on the client sites, and run the program not from the server over the network, but directly from the computer on which the employee will work. To set up work over the network, we strongly recommend that you read the corresponding item in the program help (accessed by pressing the “F1” key in the program).
Answer: Windows 7 and higher, Memory from 2 GB (depending on the number of employees), 2-core processor and higher. Also see “Hardware and Software Platform Requirements” Also see “Hardware and Software Platform Requirements”
Answer: You need to go to “Directories”, “Economic”, “Types of statements”. Click the green plus sign at the bottom left... We create, for example, a statement of dividends, pay attention to the correct setting, on the right, where automatic inclusion in the statement, there should be a checkmark opposite dividends and income tax, or any other charges/deductions that, according to Your opinion should be present to all employees.
Answer: In the program, click “Updates”, check the KLADR box and click download and install, after downloading, answer “Yes” to the question. You can also install KLADR by downloading it from our website. Next, put the archive in the “root” of the Npw folder and run the program.
Answer: Update Internet Explorer to the latest version, but not lower than 8.0.
Answer: There is no such possibility.
Answer: You can maintain more than one database (more than one organization) in the program; there is no need to additionally install the program on your computer. To do this, go to the “settings and service” menu, “Select database (My organizations)”. In the list that opens, you can add, delete and select exactly the database that you need to work at the moment.
Answer: Yes, such a function is provided, but first you need to familiarize yourself with the Readme2.txt file (if we are talking about income) which is located in the root of the program. It is also possible to import files into the program in approved structures - 2-NDFL, individual information for the Pension Fund of the Russian Federation, reporting.
Answer: All data starting from 2011 is stored in the database; to switch to another year, you need to select the desired one by clicking on the down arrow located after the year, for example in personnel data.
Answer: The summary, which opens in the “Reporting, taxes and contributions” mode, displays data for all employees who are present, while the summary in a certain statement will contain data only regarding this statement and only about those employees who are included in it.
Answer: Backup occurs when you select “settings and service”, “backup copy”, “backup copy + database disinfection”. If you need to restore the database to the state of an earlier moment, you must select the “Restore from archive” item in the same menu “settings and service”, “archive copy”, you can immediately set the frequency of creating an archive copy, the item “frequency of the archive copy”.
Taxpayer legal entity version 4.67 dated October 19, 2022
Taxpayer of Legal Entities is a program that helps entrepreneurs, businessmen, and individuals in preparing reports to the tax authorities. The program is supplied free of charge and can be used by any individual or legal entity.
Regardless of the version of the Taxpayer Legal Entity, its installation on the computer’s hard drive occurs in several stages, which we will fully describe in the version that is current at the moment.
In order to use the program, first of all, you need to download it (relevance - October 2020 ):
Installing the “Taxpayer Legal Entity” application
For legal entities who are encountering free downloading and installation of a software package for the first time, the digital abbreviation may cause difficulties.
You need to remember that:
- The taxpayer version with digital values separated by one dot are basic and include all current program updates. For example, taxpayer online in version 4.15, its installation does not require downloading previous versions;
- versions with digital numbers separated by two dots are additions to the main program. They are installed on the corresponding basic version. For example, 4.15.1 is an update to version 4.15 and can only be installed on this release.
STAGE 2
Type of installation. Here you are asked to choose to install the full version or the client part of the program. If this is your first time installing Taxpayer Legal Entity, it is better to select “full installation” and click “next”.
Software and text components of the client side of Internet sites from the standpoint of intellectual property rights.
Full current version 4.66 2022
Downloading the installation package of the Taxpayer Yul pro program for free with a patch means getting a more complete solution, compared to the basic version, with advanced functionality and expanded capabilities, capable of quickly and efficiently helping specialists in their work. This product contains:
- payment documents;
- invoice journals;
- documents for registration and registration of taxpayers under UTII;
- analytics;
- requests for information;
- registration and registration documentation used by any non-profit, foreign or non-profit organization;
- documents on opening or closing bank accounts;
- documentation for the provision of an extract.
In addition to the marked items, this software has an automatic calculation function and a control module, which allows you to maintain an archive of descriptions of reporting forms. Users can also generate a two-dimensional barcode. This is a new requirement from the tax service. Users can print and upload ready-made declarations for submission to regulatory authorities to a floppy disk or other storage medium.
The new Russian version of the program contains: changes in the formation of the XML file in the data transfer format according to the 3-NDFL form, improvements for entering tax returns, updating the code directory. By the way, the downloaded .exe file can be installed as a stand-alone program or on an older version.
Many users complain that the hacked version of the product does not function correctly. Very often problems arise when unpacking archives with reporting forms. Software developers do not stand still and with each new version they make changes to the distribution and improve functionality. For those users who are faced with the “capricious” version, there is only one piece of advice - you should disable all unnecessary running programs and services, and then restart the installation process. You can download the crack for the full version of Taxpayer Yul pro + medicine online through the website. Fast. Comfortable. Just.
Before installing the product on your computer, you need to download the file with the new version of the program. The Federal Tax Service provides it to us free of charge on the official website. You can find the download link at the very bottom of the page, in the “Software” section. Next, a list of services will open, from them you need to select “Taxpayer Legal Entity” and click on it.
On the page that opens, you will be asked to download the complete installation kit in one file. Typically, users are offered the new version by default. To start downloading, click “Download”.
By default, new files are automatically saved in the Downloads folder. You can choose the location where the “Legal Taxpayer” will be saved. After downloading, you can begin installation.
The installation process may take a lot of time, you will have to be patient.
Installation order:
Find the folder with the downloaded file on your device, double-click on it. Give permission to run the file.
Then you need to extract it from the archive, this may take several minutes.
- All extracted files are saved to the INSTALL folder located below.
- After unloading the components, the installation window will open. You must confirm that you accept the terms of the agreement and click the “Next” button.
You will then be offered different installation options. The choice is your own, but it is recommended that you opt for a full installation. After making your selection, click “Next” again.
In the new window you need to select a location for the “Legal Taxpayer” on your device. By default, the folder has already been created and a location has been defined for it. It is recommended to continue the process without changing anything.
All that remains is to run the installation. The process will take a few minutes.
When everything is finished, click “Done” in the window that opens.
A shortcut will appear on the desktop. Double-click on it, “Taxpayer Legal Entity” will launch and re-indexing will begin.
In simple words, this is an internal setting. There is no need to confirm anything here; everything is done automatically. The procedure is carried out once, after downloading and installation. There will be no re-indexing during further work. When it's finished, you'll be prompted to add the taxpayer and the required information.
Possible installation problems
Often, when installing “Legal Taxpayer”, one or another problem arises. The most common one is the requirement to restart the computer, after which the application does not want to open. You need to restart the installation. To avoid problems, it is recommended to exit the browser and close other active applications.
The second common problem is the appearance on the screen of information that the program contains dangerous viruses. If you downloaded “Legal Taxpayer” on the Federal Tax Service portal or the developer’s website, there are no malicious files in it. An antivirus tends to perceive individual components of an application as a potential threat, hence the conflict during installation. Most likely, you forgot to disable security software.
During installation, a message may appear indicating that some installation files are damaged. The solution is to delete the download file and download it again (the download may have failed). Before doing this, check your network connection. If you were provided with an installation file on a disk or flash drive at a tax office branch, the source of the problem may be damaged media. Rewrite the application to a new disk, or contact the Federal Tax Service with a similar request.
STAGE 3
Destination folder
At this stage of installation, you are asked to select the location where the program will be located. We do not recommend storing important work files on the same disk on which the system is installed. In most cases, Windows is located on the C drive, which means it is better to select another drive to install the program, of course, if it is available.
This is done so that if Windows loses its functionality (and this happens), the program’s working files are not damaged and remain safe on another drive.
If you don’t have a logical drive other than C on your computer, you will have to select a folder there, or leave the default path: C: Taxpayer Legal Entity Click next.
Just copy the files
Also, do not forget about the possibility of copying files manually, this way you can transfer personal files from computer to computer. To do this, connect an external storage medium of sufficient capacity to your computer (for example, an external hard drive) and copy all the files that need to be transferred to it. After this, connect this drive to the new computer and transfer the necessary files.
If all your files on your computer are well organized and you know their location on your hard drive, then you will not have any difficulties implementing this method.
This way, you will be able to transfer files, but not settings. If you also need to transfer browser bookmarks, you will need to export/import them using the functions of the browser itself. All modern browsers also have synchronization functions, with which you can import all settings.
STAGE 5
After the files are successfully installed into the directory, a window should appear as in the picture above. This means that the installation was successful and the program is ready to launch. You can check the box with the description “Run a program” if you want to use it immediately after installation.
Click “ready”. The installation of the Legal Entity Taxpayer program is complete.
If you minimize all active windows, you will see a program shortcut on the desktop:
Now, to use the program, you need to double-click on it and the program will open.
What is the main functionality of the application?
If we consider the main functions of the program, then among them we need to highlight:
- Preparation of reports by automating many calculations;
- Full control over the completion of reporting, including maintaining the current format;
- Preparation of information for printing on paper;
- Compiling a file to be sent digitally;
- Compiling a list of uploaded files;
- Preparation of reports using standard files.
Each subsequent update of the program allows you to make it even more functional and effective in maintaining accounting records. For example, today the application allows not only to prepare a list of taxpayers, but also of the objects they own. In the application you can make a list of the company’s employees and its contractors. An equally useful function will be the compilation of an archive with a description of reporting forms. Information can not only be stored, but also restored.
How to make your work easier: copying data
The content of some documents may be repeated (or with minor changes) from one reporting period to the next. However, this document can be voluminous.
To avoid manually entering this document again in the next reporting period, it is possible to copy data from one reporting period to another. For this:
1. Set the reporting period in which this document was entered.
2. Click on the button.
3. In the window that appears, select the reporting period where you want to copy data from the current reporting period.
The list of reporting periods available in the window that appears is built on the basis of a directory of presentation periods, which can be viewed in the Settings→Reporting forms .
If a document cannot be correctly copied to another reporting period due to a change in the description of the reporting form, the required reporting period may not be in the list of periods available for copying.
The reporting period you select must be different from the current reporting period.
The copying itself is performed by pressing the <Run> . At the same time, if the document selected for copying has already been entered for the reporting period, it is necessary to confirm this intention.
If in the reporting period a document has multiplicity criteria, but not in the reporting period selected for copying, and at the same time in the reporting period the document was entered according to several criteria, then a list of entered criteria for the document for copying will be displayed.
If updated calculations were entered in the reporting period, then only the last updated calculation will be copied. And it will become the main one.
When the list of available reporting periods includes reporting periods with different frequency of presentation (for example, monthly and quarterly), you can change the frequency of document submission.
You have entered a document for the month of March. In order to make a document submitted for the 1st quarter, you must select the appropriate reporting period from the list. After confirmation, the document's submission frequency will be changed.
If, after copying a document, you want to change the reporting period to the one being copied, check the appropriate option.
How to enter the Documents PU 6 program?
After the first launch of the program, a window will pop up in which we will be asked to enter a login and password. The default login will be set to “Administrator”, and the default password is 111. Enter 111 and click “Login”.
Interesting materials:
How much should you eat to gain weight? How long do you need to go to the gym to lose weight? How much paint do you need per 1 square meter? How much salt should you salt milk mushrooms? How long should salted meat be soaked? How long does it take for a registered letter to arrive at Ukraine Post Office? How much cash can you carry across the border? What is the population of Georgia 2020? What is the population of the USA and Russia? What is the population of Turkmenistan in 2022?
How to work in the new version of Taxpayer Legal Entity 2022
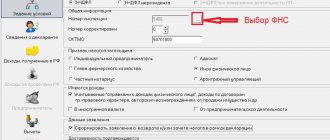
Work in the program begins with creating a taxpayer profile. This procedure consists of entering all the necessary data about a legal entity or individual for work. To do this, you need to click on the “Add taxpayer” button at the top of the window. In addition, the first time you launch it, the menu to add it appears automatically. First of all, you need to select the type of payer. For example, a legal entity, an individual entrepreneur, an individual, and so on.
After this, a window with several tabs will appear. Each tab has cells in which you must enter the relevant data. In particular, the first tab is devoted to general information, the second - information for submission to the Federal Tax Service.
The program allows you to work with several profiles and automatically saves all entered data. Once the payer profile has been created, you can begin directly preparing the necessary reports or documents. To do this, you need to select the document of interest in the menu located on the left side of the window. Then the following window will open in which you need to click the “Create” button.
The figure shows an example of creating a register of VAT information.
EaseUS Todo PCTrans
This package of utilities supports Windows versions from XP to Windows 10 and can transfer data from an older operating system to a new one or between the same versions. But the reverse move - for example, from 10 to Vista - is not supported and is unlikely to be of interest to anyone.
EaseUS Todo PCTrans must be installed on both machines and connected via a wired LAN or wireless network. On both computers in the program, select the “Via network connection” option. Next, specify the direction and types of data to be transferred. There are two options available: Applications and User Data. Optionally, you can select specific folders in the directory tree. Just click on the “Transfer” button, and data migration will begin before your eyes.
The program can be used differently - to create backups. This option is suitable for situations where the old and new computer cannot be connected via a network.
You will need the "Via an image file" option and the "Create the image file" tool. Select the folders and applications that you want to transfer, specify the path to save the image and click “Save”. Transfer the resulting image in any convenient way - for example, through an external drive - to a new computer and start copying and unpacking with the “Transfer from the image file” command.
The developers offer EaseUS Todo PCTrans in two versions: Free and Pro. The first will allow you to transfer only two applications (files and folders in any quantity) for free. The second does not have this limitation, but purchasing a license will cost $49.95.
